User Manual
Everything you need to know about using MailSignal.
Getting Started
Installation
- Download the latest installer from the releases page
- Run
MailSignal-Setup.exe- no admin rights required - Launch MailSignal from your Start menu or desktop shortcut
First Launch
When you first open MailSignal, you'll see a welcome dialog explaining the app. Click Add Account to connect your first email account, or close the dialog to explore the interface first.
The main window displays your configured accounts and their unread counts. A taskbar icon shows your total unread count at a glance.
System Requirements
- Windows 10 or Windows 11
- Internet connection for email sync
- Chrome browser (optional, for profile selection feature)
Adding Accounts
MailSignal supports Gmail (personal and Google Workspace), Microsoft 365 (personal and business), and Microsoft Shared Mailboxes.
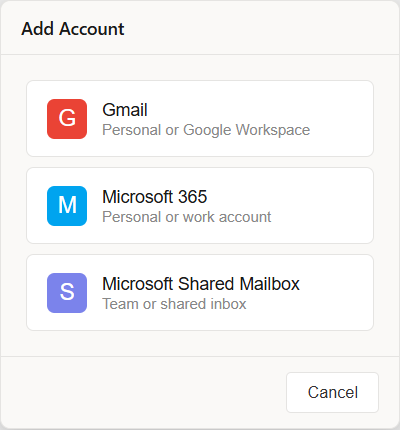
Adding a Gmail Account
- Click the + Add Account button
- Select Gmail
- Enter your email address when prompted
- Your browser will open to Google's sign-in page
- Sign in and grant MailSignal permission to read your unread count
- Choose how to open your inbox:
- Chrome (with profile) - Select a specific Chrome profile
- Default Browser - Opens in your system default browser
- Click OK - your account is now connected
gmail.labels permission. This allows reading label metadata (including unread counts) but does not grant access to email content, subjects, or sender information.Adding a Microsoft 365 Account
- Click + Add Account
- Select Microsoft 365
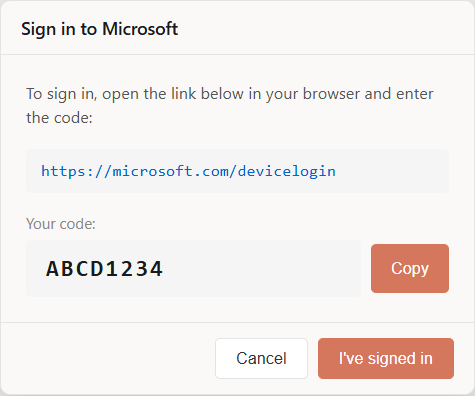
- A dialog will show:
- A verification URL (click to open)
- A device code (click Copy to copy it)
- In your browser, enter the device code and sign in to your Microsoft account
- Return to MailSignal and click OK
- Choose your launch method (Chrome profile, Default Browser, or Outlook app if installed)
- Your account is now connected
This works with both personal Microsoft accounts (outlook.com, hotmail.com) and Microsoft 365 work/school accounts.
Adding a Microsoft Shared Mailbox
Shared mailboxes are team inboxes that multiple people can access. To add one:
- Click + Add Account
- Select Microsoft Shared Mailbox
- Sign in with your personal account (the one that has access to the shared mailbox)
- Enter the shared mailbox email address (e.g.,
team@company.com) - Choose your launch method
Main Interface
The Taskbar Window
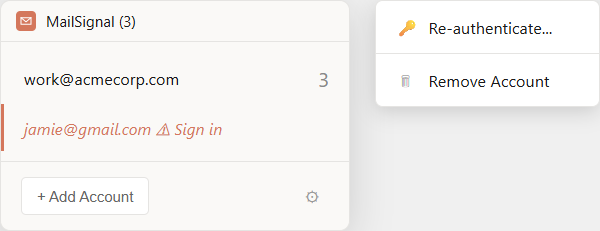
The main window shows all your configured accounts with their unread counts:
- Email address - Click to open that inbox
- Unread count - Number of unread messages (or • if zero)
- Coral accent - Accounts with unread messages have a colored left border
Opening Your Inbox
Click any account to open its inbox. MailSignal will:
- First try to find and activate an existing browser window with that inbox
- If not found, open a new browser tab or window
If you configured a specific Chrome profile, that profile will be used.
Taskbar Icon
The MailSignal icon in your taskbar shows your total unread count:
- 1-9 - Shows the exact number
- + - Shows for 10 or more unread
- No badge - All inboxes at zero
Control Buttons
- + Add Section - Create account groups (Pro feature)
- + Add Account - Connect a new email account
- ⚙ Settings - Access settings, manage accounts, and licensing
Settings
Click the ⚙ gear icon to access settings.
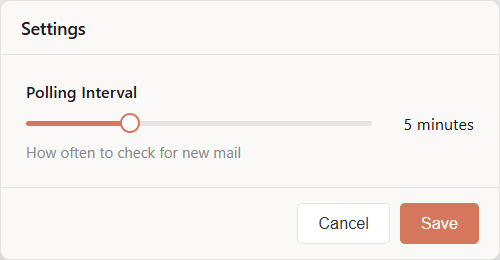
Polling Interval
Controls how often MailSignal checks for new mail:
- Free tier: 5 minutes to 1 hour
- Pro tier: 10 seconds to 1 hour
Shorter intervals mean faster updates but use more network requests.
Launch Settings
Configure how each account opens its inbox:
- Chrome (with profile) - Opens in a specific Chrome profile
- Default Browser - Uses your system default browser
- Outlook New (App) - Opens in the Outlook desktop app (Microsoft accounts only, if installed)
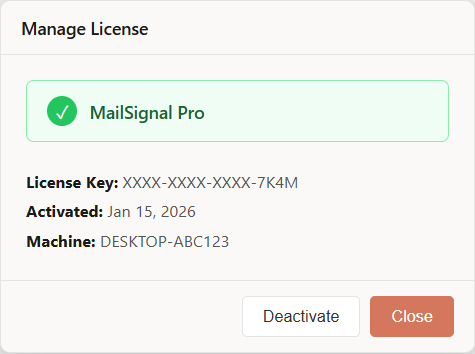
Manage License
View your license status, activate a Pro license key, or purchase Pro.
Managing Accounts
Access account management via ⚙ Settings → Manage Accounts.
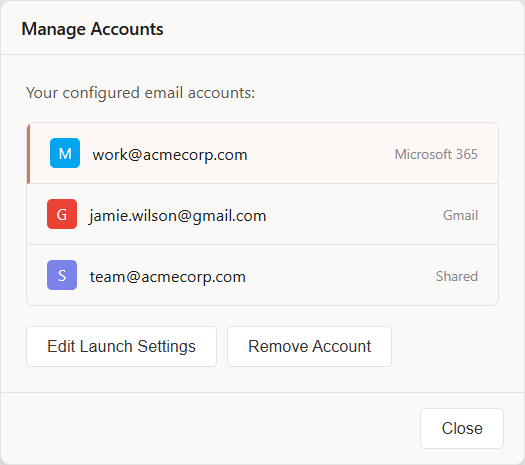
Edit Launch Settings
- Select an account from the list
- Click Edit Launch Settings
- Choose your preferred launch method and Chrome profile
- Click OK to save
Remove an Account
- Select the account to remove
- Click Remove Account
- Confirm the removal
This removes the account configuration and deletes all saved authentication tokens.
Re-authenticate a Failed Account
If an account shows a ⚠ Sign in warning (authentication expired):
- Right-click the account in the main window
- Select Re-authenticate...
- Complete the sign-in process
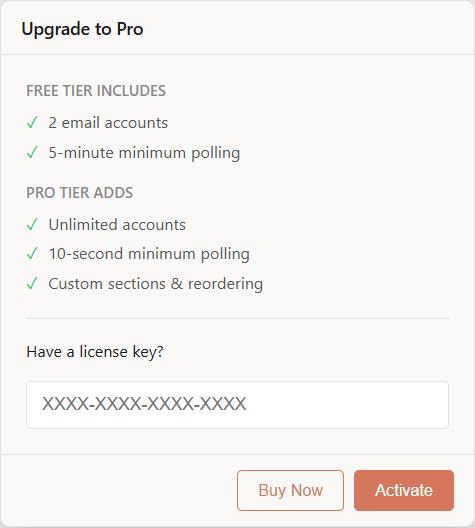
Pro Features
Upgrade to Pro for $25 USD (one-time purchase) to unlock:
Unlimited Accounts
Free tier is limited to 2 accounts. Pro removes this limit entirely.
Faster Polling
Check for new mail as frequently as every 10 seconds (vs 5 minutes on free tier).
Custom Sections
Organize your accounts into named groups:
- Click + Add Section
- Enter a section name (e.g., "Work", "Personal")
- Drag accounts into the section
Right-click a section header to rename or delete it.
Drag & Drop Reordering
Arrange accounts and sections in any order by dragging them.
Chrome Profile Selection
Use different Chrome profiles for different accounts - perfect for keeping work and personal browsing separate.
Activating Your License
- Go to ⚙ Settings → Manage License
- Enter your license key
- Click Activate
Your license works on up to 3 computers.
Troubleshooting
Authentication Issues
Gmail authentication times out
The authentication window has a 5-minute timeout. Make sure to complete the Google sign-in within this time. If it expires, click Cancel and try again.
Microsoft device code expired
Device codes are valid for about 15 minutes. Start the process again and complete sign-in promptly.
Account shows "Sign in" warning
Your authentication token has expired (this can happen if you changed your password or revoked access). Right-click the account and select Re-authenticate.
Shared Mailbox Issues
Can't access shared mailbox
Ensure your account has delegate access to the shared mailbox. Contact your IT administrator to grant the necessary permissions.
Browser Launch Issues
Chrome profile not found
The configured Chrome profile may have been deleted or renamed. Go to Manage Accounts → Edit Launch Settings and select an existing profile.
Wrong browser opens
Check your launch settings for that account. If set to "Default Browser", it will use your Windows default browser setting.
License Issues
License activation fails
Check your internet connection and verify the license key is entered correctly. If you've already activated on 3 machines, you'll need to deactivate one first.
Data & Privacy
Where is my data stored?
All data is stored locally in %USERPROFILE%\.mailsignal\:
accounts.json- Account configurations (encrypted)license.json- License status (encrypted)*_token.json/*_msal_cache.json- Authentication tokens (encrypted)mailsignal.log- Application log (if enabled)
All sensitive data is encrypted using Windows DPAPI, tied to your Windows user account.
Getting Help
If you're still having issues, email support@mailsignal.app for assistance.